ChatGPT AI - A Story Writer (Difficulty: 3)
-
References
Introduction
In this tutorial, you will create a story-writer project using the ChatGPT model from OpenAI. It will allow the user to specify any topic, then generate a story based on that topic.You will also learn how to use widgets, which are essential for building AI-based tools. Three commonly used widgets will be introduced: button, label, and textbox. Also, you will learn how to control their layout on the stage.
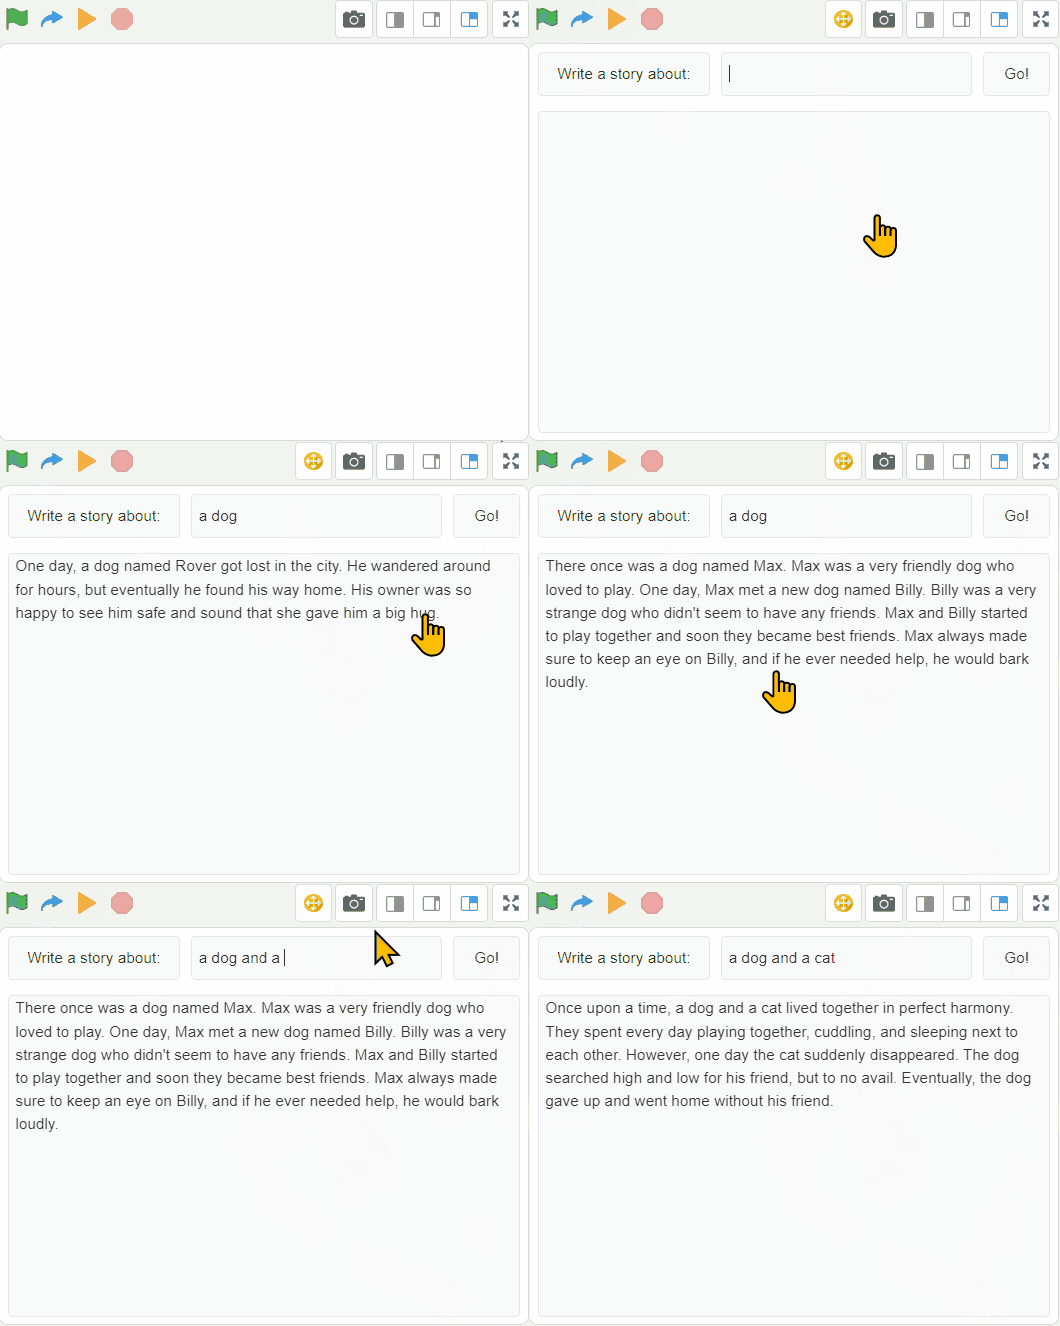
Here is what the tool will look like:

Step 1 - Create A New Project
Please create a new project in the CreatiCode playground. Remove “Sprite1” with the dog, as we will only need to use the “Empty1” sprite.
Step 2 - Add a Label, a Textbox and a Button
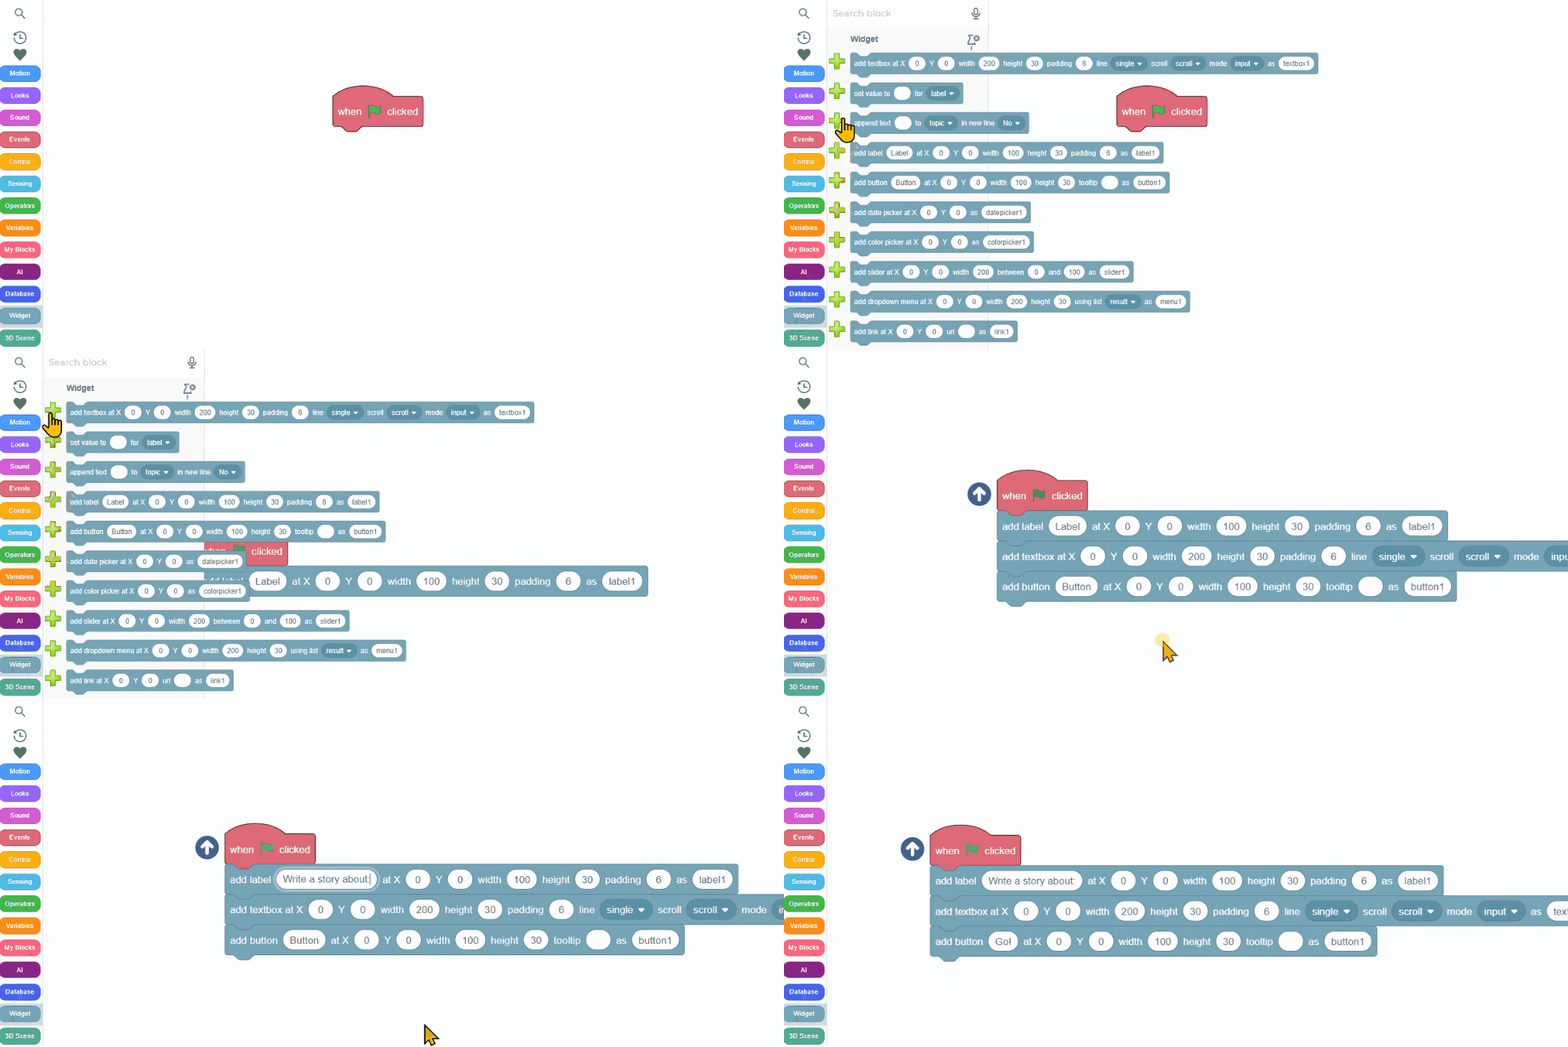
Next, please add 3 widgets:- A label that says “Write a story about:”
- A textbox
- A button that says “Go!”
Don’t worry about their positions or sizes at this point. We’ll set them up in the next step.
Here is how to add these 3 widget blocks quickly:

Step 3 - Place the 3 Widgets into a Row
Next, we’ll apply a “layout row” to quickly arrange the 3 widgets on top of the stage.The concept is straightforward: the top section of the stage is treated as an invisible “row,” subdivided horizontally into multiple invisible “cells.” These cells act as placeholders for positioning widgets neatly.

Here is the new block you need to add:

Here is the meaning of the inputs again:- Row Name: The new row is named “r1”.
- Height: The row occupies 15% of the stage height.
- Cell Division: The row is divided horizontally into three cells with widths of 35%, 50%, and 15%, respectively, from left to right.
- Widget Names: The widgets “label1”, “textbox1”, and “button1” are resized and placed into these cells accordingly.
- Margin: A margin of 2 units creates a thin spacing between the row and the edges of the stage.
- Padding: A padding of 5 units provides spacing between each of the three widgets.
You can try adjusting these values and observe how the sizes and positions of those three widgets change.
Step 4 - Add Another Textbox
Now we need to add another textbox to display the story written by the ChatGPT model. Please name the new textbox “textbox2”, and make sure it supports multiple lines. Again, you don’t need to worry about its position or size, since we will use another “layout row” to set its position and size later.Here is this new block:

Step 5 - Place the Second Textbox In a New Row
Now we can define a new layout row with only one cell in it. Then we simply make the new textbox fill in the entire cell:
Here is the new block for adding a row named “r2”, and allocating 100% of its width to “textbox2”. This is much simpler, as there is only one cell in this row that spans the entire width.
Step 6 - Generate the Story Using ChatGPT
When the user clicks the “Go!” button, we will use ChatGPT to generate a story.To compose our request, we need to join 2 phases together: a fixed phrase "write a story in 100 words about ", and the topics from the user’s input (value of the ‘textbox1’). Note that there should be a space after “about”, otherwise the word “about” may be connected to the first word of the user input.
We can store this request in a variable like this:

To send this request to ChatGPT, we can use the following block. It will store the response from ChatGPT in another variable named “story”. This block will be in the “waiting” mode, which means it will remain active until we get the full response from ChatGPT. The length of 200 is the maximum number of “tokens” we ask for, which is about 150 words. That is more than enough, since we are asking for a 100-word story. The “temperature” is 0.8. The closer it is to 1, the more creative the story.

To show the story written by ChatGPT, we need to set the reported result as the value of “textbox2”:
Lastly, we should trigger the above whenever the user clicks the “Go!” button. So here is the complete solution:
Now, whenever we click the “Go!” button, we get a new story:
Creative Ideas
This tutorial has shown you how to use widgets to build a simple application, and also how to use the ChatGPT model to generate new content. Here are some ideas for you to further explore:-
Other Types of Content: Instead of stories, you can also use ChatGPT to write other types of content, such as jokes, poems or songs.
-
Beautify the Widgets: You can set the text and background styles of the widgets to make them more appealing, such as:

-
Streaming Mode: Instead of waiting for the entire story to come back, use the ChatGPT block in the “streaming” mode, so you can reveal the story chunk by chunk as soon as it arrives.
-
Refine instructions on how to write the story: You can try to give ChatGPT more detailed instructions on how the story should be written, such as its genre (e.g. scifi or nonfiction), language (e.g. spanish), tone (e.g., humorous or serious), target audience (e.g., children or adults), setting (e.g., futuristic city or medieval village), character details (e.g., their backgrounds, motivations, and relationships), specific plot elements or twists you want to include, themes (e.g., friendship, betrayal, or discovery).
-
Pinned by
info-creaticode